
Before After Wheel Refurbishment: What Changes?

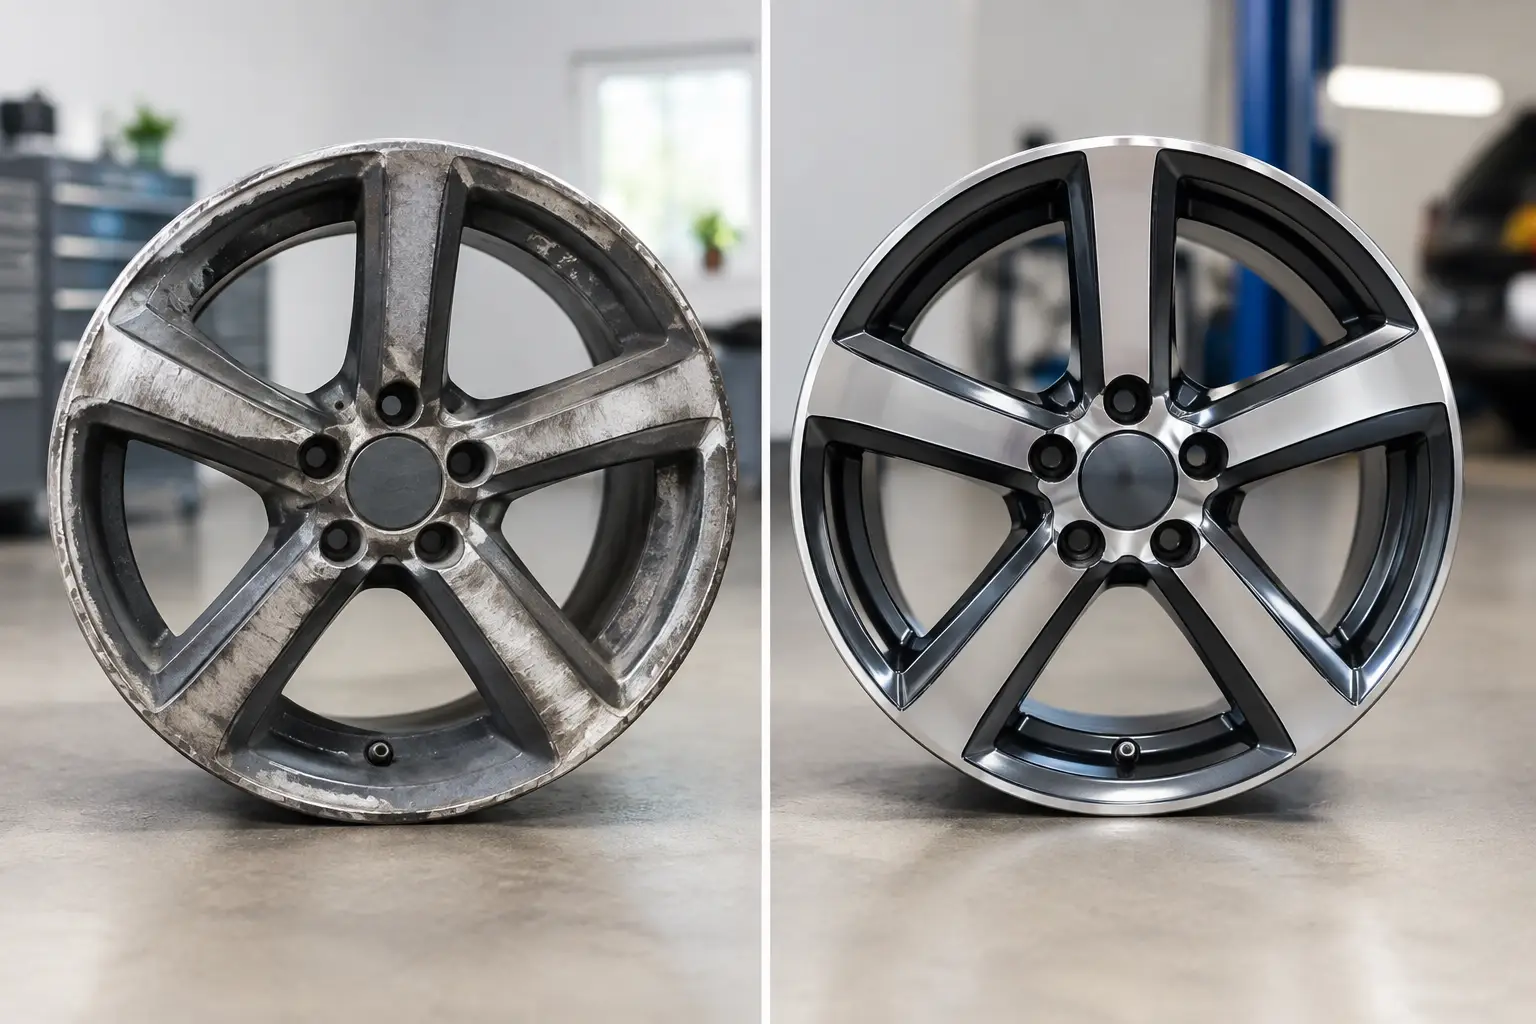
A kerbed alloy can make an otherwise well-kept car look tired every time you walk towards it. The difference shown in before after wheel refurbishment is often striking, but the real value is not simply a fresher finish. Done properly, refurbishment removes corrosion, improves protection around the rim and gives the wheel a uniform appearance that suits the vehicle again.
For daily drivers, a tidy set of wheels can lift the whole car without the cost of buying a new set. For enthusiasts, it is often the finishing job after tyres, suspension or bodywork have been sorted. The key is understanding what refurbishment can genuinely repair, what it cannot, and why wheel preparation matters as much as the final coat of paint.
Before after wheel refurbishment: what you can expect
Most wheels arrive with a mixture of kerb damage, chipped lacquer, brake dust staining and corrosion creeping in from the tyre bead or centre cap area. Diamond-cut wheels can also develop the familiar white, milky corrosion beneath the lacquer. At the beginning, the damage may look localised. Once the old finish is removed, the full condition of the alloy becomes clear.
After refurbishment, a sound wheel should have an even colour, consistent gloss or satin level, clean edges and no visible corrosion beneath the paintwork. Kerb marks should no longer catch the eye, while the rim profile should look smooth rather than filled with obvious ridges. On a full set, matching the finish across all four wheels is just as important as making one damaged wheel look better.
The result depends on the finish and the wheel’s starting condition. A standard painted silver, black or anthracite wheel is generally the most straightforward to restore. A diamond-cut face can look excellent too, but it needs more care and comes with a different set of compromises. The machining that creates the bright, turned-metal effect removes a small amount of material, so a wheel can only be recut a limited number of times.
The refurbishment process behind the transformation
A quality refurbishment is a controlled repair process, not a quick coat of paint over damage. The tyre, valve and wheel weights are removed first so the entire rim can be assessed. This also allows the technician to inspect the bead seat, where corrosion can cause slow pressure loss.
Inspection comes before cosmetic work
The workshop should check for cracks, buckles, previous repairs and signs of impact damage. Cosmetic refurbishment is suitable only when the wheel remains structurally sound. A crack around a spoke, a heavily distorted inner barrel or serious damage near a mounting face needs a different assessment. In some cases, replacement is the safer and more economical decision.
This is especially relevant on larger, lower-profile wheel and tyre packages. There is less tyre sidewall to absorb pothole impacts, so the wheel is more exposed. If you have noticed vibration through the steering wheel, repeated pressure loss or a tyre that will not balance correctly, ask for the wheel to be checked before booking a cosmetic finish.
Stripping, preparation and repair
The old coating is stripped or removed through suitable preparation methods, exposing the alloy beneath. Corrosion and damaged areas are then treated, and minor kerb marks are carefully repaired. The aim is to restore the shape of the rim without removing unnecessary material.
Preparation determines whether the new finish lasts. The surface must be clean and properly keyed, with repairs blended into the surrounding alloy. Rushing this stage can leave pinholes, uneven texture or an early return of corrosion under the coating.
For painted finishes, the wheel receives primer, colour and lacquer in the chosen specification. For diamond-cut designs, the painted areas are completed before the face is precision-machined, then protected with a clear lacquer. Each stage needs appropriate curing time. A wheel that looks smart on collection but has been poorly prepared is unlikely to stay that way through a British winter.
Tyres are refitted and the wheel is balanced
Once the finish has cured, the tyre can be refitted, inflated correctly and balanced. This is the right time to inspect tyre condition, tread wear and sidewall damage as well. Refurbishing a wheel while fitting worn or mismatched tyres can be a false economy, particularly where handling, wet-weather grip and load rating matter.
A workshop that deals with wheels and tyres every day can assess both parts together. That means the finished wheel should not only look right, but also seal correctly, balance accurately and suit the vehicle’s specification.
Painted or diamond-cut: choose for real-world use
A painted finish is usually the practical choice for a car used throughout the year. It offers a wide choice of colours, is easier to maintain and can be more forgiving when future kerb damage occurs. Gloss black creates a sharp modern look, while satin black, gunmetal and factory-style silver can suit a broader range of vehicles without making every mark stand out.
Diamond-cut wheels have a premium factory appearance, especially on Audi, BMW, Mercedes, Porsche and Range Rover fitments. However, their lacquer can be more vulnerable once it has been chipped by a kerb, stone or harsh cleaning chemical. Moisture can travel beneath the clear coat, creating corrosion that spreads beyond the original mark.
If appearance is the priority and the car is carefully maintained, diamond cutting may be worth it. If the vehicle covers high mileage, sees winter roads or regularly encounters tight kerbs, a painted alternative can be the better long-term choice. Some owners choose a painted version of the original design specifically to reduce future maintenance.
What refurbishment cannot fix safely
Wheel refurbishment is not a cure for every problem. Deep gouges, light kerbing and surface corrosion are normal candidates for repair. Structural faults are different. Cracked wheels, severe buckles, damaged bolt holes and major impact damage require specialist inspection, and sometimes the correct answer is a replacement wheel.
It is also worth being realistic about heavily corroded wheels. Corrosion around the bead seat may be repairable, but extensive pitting can limit the final result. Likewise, a wheel that has already been diamond-cut several times may not have enough material left for another cut within safe tolerance.
Do not judge a wheel only by its visible face. The inner barrel can be bent after pothole damage, and the rear of the spokes can hide corrosion or old repairs. A professional assessment prevents money being spent on cosmetics when the wheel’s condition points towards replacement instead.
When refurbishment is better than buying another wheel
Refurbishment often makes sense when the wheels are original equipment, structurally sound and difficult to replace as a matching set. It is also a sensible route for quality aftermarket wheels where the correct width, offset, centre bore and load rating have already been established.
Replacement may be preferable when one wheel is badly damaged, the finish has failed repeatedly, or you are changing the vehicle’s look and specification anyway. Buying used wheels can be a cost-effective option, but fitment must still be checked carefully. Diameter and width alone are not enough. Offset, PCD, centre bore, brake clearance and tyre compatibility all affect whether a wheel will fit and perform properly.
For drivers in Dorset, bringing the vehicle to a fitting centre can make the decision simpler. The wheel can be inspected, refurbished or replaced as appropriate, then paired with suitable tyres and balanced before it goes back on the road. The Tyre Barn’s workshop experience is particularly useful where a wheel issue and a tyre issue may be connected.
Keeping refurbished wheels looking their best
The first few weeks after collection are a good time to establish a simple cleaning routine. Use a pH-neutral wheel cleaner, a soft brush and regular rinsing rather than relying on strong acidic products. Brake dust is easier to remove before it has baked onto the finish, and cleaning behind the spokes helps prevent corrosion from taking hold unnoticed.
Avoid using a wheel cleaner on hot wheels straight after a drive. Let them cool first, then wash one wheel at a time. If you pick up fresh kerb damage, deal with it promptly. A small chip in lacquer can allow moisture underneath the finish, turning a minor mark into a larger refurbishment job.
A well-refurbished wheel should make the car feel cared for every time you see it. More importantly, the right inspection and preparation ensure that the improvement is not just for the before-and-after photo, but for the miles that follow.